Someone left their refridgerator door open!!
Brrr...it's cold outside....but this is Texas, it was 75 yesterday and 27 today. Here's what's outside my door:

Some of it is ice, but it is pretty anyway. We had actual snow around lunchtime when Kerry and I were off to lunch. Yep, UNT was open until 3pm...at least I got outta class tonight!!
So, what is good to do when your stuck at home? KNIT!!! I have spent my snowy hours at home knitting...and trying to turn the heater on without setting off the smoke detector.
And now, for your amusement, for one and all, I provide you with a laugh I came across on the knittyboards:
How To Felt with Acrylic Yarn by Gail
List of Materials Needed:
1. Some acrylic yarn. Make sure it doesn’t have any natural fiber content in it whatsoever. That would be bad.
2. An oversized stock pot. The one you attempted to use to Brine your turkey before you accidentally killed all your relatives will serve you well here. Plus, it’ll hide the evidence.
3. A blow torch.
4. An oven. Preferably one that you don’t plan on using much in the future.
5. A welding shield.
6. Some tongs.
7. Some leather gloves. Not the nice ones - the heat shielding kind.
Step 1:
Knit something out of that acrylic. Make it bigger than you want the final results to be.
Step 2:
Drinking some alcohol is probably a good idea here.
Step 3:
Turn on the oven as high as it will go. Throw your knitted acrylic garment into the oversized stock pot, and stick that in the oven. It is a matter of great debate on whether or not you should add water - water will probably slow the felting process, but may keep the yarn from melting to the bottom of the pot. Maybe you should add some canola oil or something.
Step 4:
Open a window. Take the batteries out of the fire alarm.
Step 5:
Check on your garment. If all is going well, it will become soft and melty. With the gloves and tongs, coax it into the shape you want. You may also want to stir it around to make sure that it isn’t sticking.
Step 6:
Once your garment has shrunk down and appears to be the correct shape, remove the stockpot from the oven. Throw a bunch of water into it. You might want to put on the welders shield now. Then, with the tongs, remove the item from the pot, and arrange it charmingly. You should no longer be able to see individual stitches. You may find that your garment is a bit inflexible - that is to be expected.
Step 7:
Once your garment has cooled, you can use the blow torch and tongs to make any last minute adjustments, such as creating holes in your slippers for the feet.
Step 8:
Enjoy your fabulous felted acrylic garment!


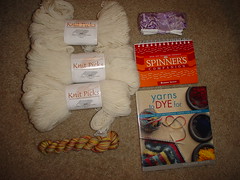
 What's that? It looks like a bunch of yarn? Well, it is...I said my Christmas SHOPPING was done...not my Christmas KNITTING!! I promise, everything will be photographed and posted in due time.

 (
(